Monday 26 January 2015

TRADITIONAL WORLI ART


India, an agrarian country & birth place to one of the earliest civilisations, is famous for highly animated lifestyle of natives. It wont be surprising to say, that the Indus civilization led to the birth of many tribes, and the tribes eventually led to different tribal arts, (as an expression of individuality through it). The tribal artist of India, paint as a part of their celebration of life, its various cycles, & the abundance of nature.
Worli Art, roots out of the Worli Tribe of Maharashtra., depicting vivid elements of the native tribal lifestyle. The art initially festooned the walls of rural community dwellings, by using rice flour paste on the mud surface.


The modern era has been marked with the Tribal Art exploring the contemporary mixed medias, as an advanced take on rice flour paste & mud surface.
Different Base alternates:
1) Wall coated with Clay ; Clay – Cow Dung Mixture (2:1)
2)   Primer/paint coated ply board
3)   Canvas ; Silk ; Cotton ; Jute
4)   Paper
5)   Terracotta pots/ plates

The ideal base color complementing the aesthetics of Worli Art is advised to be Mud, Brown, Black & White.
While, the color of medium could be White, Brown or Black, in accordance to the color of base.
Different Medium Alternates:
1)   Natural colors (using Kikar gum paste as fastness fixer)
White – Chalk Powder/Rice Paste;
Brown – Coffee Bean / Neem Bark Powder
Black - Soot
2)   Poster Color
3)   Water-proof ink
4)   Permanent Marker
5)   Acrylic Color


HOW TO MAKE A WORLI PAINTING.

1)   Select a theme, inspired from human routine (example morning ritual etc.)
2)   Deconstruct the selected theme.
3)   Try to doodle the elements post deconstruction (preferably free hand).
4)   Take cues from the wireframe used during Worli painting.
5)   While being conscious about base & medium, attempt to paint Worli figurines, predominantly highlighting the silhouettes of the chosen elements.


Sunday 4 January 2015

THE ADVENTURES OF THE PEG DOLL


Wooden dolly peg dolls are one of the most popular traditional homemade toys, going back to Victorian times in Britain, still loved by many and made in the same way. Poor children in 19th century England who couldn’t afford those magnificent Victorian dolls made humble peg dolls with wooden cloth pegs and scrap fabrics. 
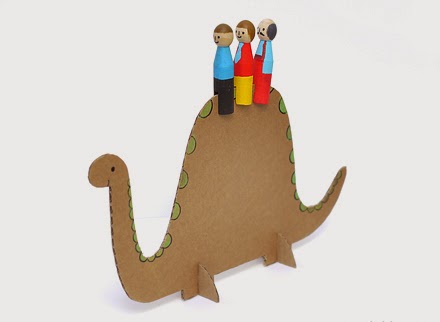
We love making peg dolls, but this time we shortened and just painted the pegs instead of dressing them up with fabric, then we took them on whole new adventures with fun cardboard animals & vehicles they can ride on!

HOW TO MAKE PEG DOLLIES AND CARDBOARD VEHICLES

1. Cut the dolly pegs with a hand saw so they stand up. Mark a line with a pencil (you can wrap a piece of paper around to help draw a straight line) and cut as straight as you can. Sandpaper them well so the edges are smooth and free of splinters.


2. Paint them as you like. Draw fun faces and your favorite clothes.

3. Draw animals & vehicles onto cardboard. Cut them out. Cutting cardboard is not easy for children, so like sawing the pegs, this will be a parents only part.


Use our templates if you like. These are for making the animals, a bicycle and a helicopter featured in the photos.

4. Cut the slots at the feet of the animals and vehicles. Cut small pieces of cardboard with slots facing upwards. When slotted together, they should stand up straight. Glue them if you like. You can make any fun animals or cars in this way. Color and decorate them!

Slotted cardboard animals are also great classic homemade toys. We’ll have more on these later!

Now your peg dolls can ride on the cardboard creatures and vehicles and go on big adventures! Hope you all have loads of fun!
  

PEG DOLLS WINTER WONDERLAND


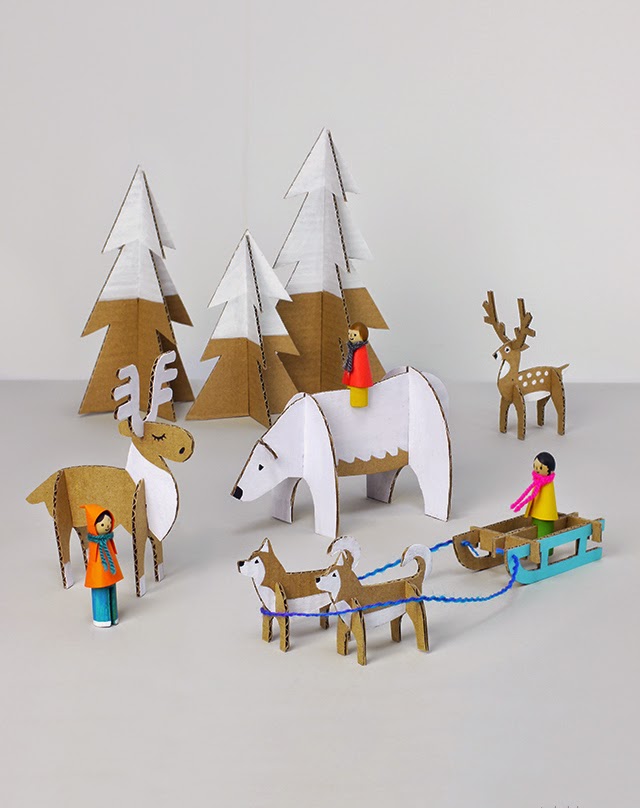
We never get bored of playing with peg dolls and making cardboard toys. It’s icy cold outside so for more indoor fun to survive the winter without boredom, our DIY peg dolls and cardboard slotted animals are ready to take you on a winter adventure! We have a lovely deer and a big moose from a winter forest, plus a polar bear and huskies visiting from the arctic.


Simply print and cut out the templates and trace them onto cardboard saved from brown boxes. We have many from Christmas deliveries.
Cut with a craft knife and adjust the slot sizes depending upon your cardboard thickness. Parents will need to cut the cardboard as thick boards are not so easy to cut. Children can start decorating the pieces as you cut.
Once cut out and decorated, you can slot the pieces together to create all the standing animals and the sled in the picture.


We took out the peg dolls we made before, but they weren’t wearing enough clothes for this cold weather, so we gave them warm coats and scarves.
You can simply cut a small piece of paper to wrap around their body and add a little yarn to tie around the neck.

Keep warm on your icy adventures and don’t forget to be back in time for a cup of tea!

If you’re not familiar with these peg dolls, check out the next post about how to make peg dolls.


DOWNLOAD

Cardboard Winter Animals Templates