Tuesday, 23 February 2016

PEBBLE PAINTING


There are so many variations and techniques of painting to try ! Painting stones and pebbles is a fun and memorable way to finish up a trip to the beach or a riverside walk.Collecting stones and pebbles of different shape,size and colour is fun. This activity connects us with nature and its beauty.


MATERIALS YOU NEED: 
  1. Pebbles and stones
  2. Pencil and white paper
  3. Wax crayons or Poster colours or Acrylic colours
  4. Paint brushes
  5. Colour mixing palette
  6. A glass of water
  7. Clear varnish or Lacquer


HOW TO MAKE:
  1. Clean the pebbles with water and soap and allow to dry them before painting .
  2. Decide what you are going to use the finished stone for.
  3. Draw a design for the pebble on a white paper.

PAINTING PEBBLES WITH WAX CRAYONS


Paint the stone / pebble with wax crayons as per design,than heat this painted stone on the low flame of gas burner , as the wax crayons start melting , remove it from gas burner. If you wish , can do the second coat of wax crayons on the stone to make it bright and more shiny. After cooling the wax crayon colours will fix on the stones and transform into the masterpiece.


PAINTING PEBBLES WITH POSTER COLORS OR ACRYLIC COLORS


  1. Paint the stone with your design
  2. Allow the paint to dry and then cover it with a protective layer of clear varnish or lacquer. This will also give your pebble a nice shiny finish.
  3. Once this is dry, your painted stone is complete!


The great thing about painted pebble is that you can use the finished pieces to decorate your home or garden or can give them as gifts or use as paper weights or as a decorative fridge magnet (for which you could glue a magnet to the back of your pebble).
Also, to make decorative fridge magnets, the pebbles should be lightweight and small in size.

Monday, 22 February 2016

CRYSTAL RANGOLI

Rangoli is desired from Sanskrit word "Rangavalli". Rangoli is an art form from  India, in which patterns are created on the floor in living room or courtyards or in front of the house using materials such as coloured rice, rice flour, coloured sand, flower petals, colour powder etc. It's usually made during festivals, auspicious observances, marriage celebrations. The purpose of Rangoli is decoration and it is thought to bring good fortune. It is a preliminary necessity of any religious rituals.

By: Akshita Sangwan

With time, imagination and innovative ideas in Rangoli art is also incorporated. A modern variation, viz, crystal rangoli design made with beads and crystals has all the charm and creativity of a traditional rangoli.

MATERIALS YOU NEED:
  1. OHP Sheet
  2. Crystals and beads
  3. Fabric glue (transparent)
  4. Tracing paper
  5. Clear tape
                                                                                                            By : Ankur        

HOW TO MAKE:
  1. Draw a design on the tracing paper.
  2. Designed tracing paper is pasted on the back of the OHP sheet with clear tapes on the edges.
  3. Stick crystals and beads with the transparent fabric glue on the design identical to the OHP sheet.
  4. After completing the design, remove the tracing paper.

It's a sublime rangoli design that would look beautiful in the centre of a room. Corner & side tables can be designed with simple rangoli designs too. These are ready made rangoli designs which have to be pasted or placed on the desired areas.


A simple and quick rangoli, who do not have time to create elaborate designs.

Sunday, 17 January 2016

PAPER SNOWFLAKE STAR


Be Creative to be Positive and Happy

Activity to make Paper Snowflake Star is fun and the product has multiple utility.It can be used as hanging on the plants , trees , walls or windows. It can be used to decorate the floor and table also for the special days or festivals.

Materials You Need:
1. Paper - Coloured construction paper , white copy paper , pastel sheet , novelty paper (use any type )
2.Scissors
3.Clear tape
4.Stapler
5.White glue

How To Make:
1.Cut six pieces of paper in square shape of any size. I have used the square paper of 11 cm. size.
2. Fold each of the six pieces of paper in Half diagonally, then fold this double paper at the centre line. Cut off the extra paper to make a perfect triangle.
3.From the folded edge of triangular paper , mark three parallel lines of equal size along the bottom open folds by leaving an indent of 0.5cm. Cut the marked lines together by holding the layers of open bottom .
4.Unfold the triangles and turn it , so that one of the points of square faces you and mark the numbers 1,2,3,4 to both the sides of triangular cutting lines as shown in the images.


5.Roll the first (no.1) two innermost paper lines together to form a tube  over a pencil , tape these two pieces together .
6.Turn the square paper over the other side . Take the next two paper lines (no.2) and pull them together on the opposite side of the tube and tape together as before.


7.Turn the paper again and pull up the next two paper lines (no.3) together to make the tube and tape together as before .
8.Turn the paper again and pull up the final two paper lines (no.4) together to make the tube and tape together. This will be used as one Strand or Arm of the STAR.


9.Repeat steps 4 to 8 with remaining 5 pieces of square papers.
10.Now arrange Three of the completed rolled pieces in such a way that no. 3 tube faces the no.4 paper tube. Staple them together using the other end. Do the other 3 pieces the same way.
11. For smaller sizes of square paper , white glue can be  used in place of staples.
12. Staple the Two parts together in the middle by placing no.3 tube line facing the no. 4.
13. Staple where each of the six Arms meet to pull up the shape into place. 

Use it as Hanging or as a Decorative piece for table or floor etc or in other ways you like.This snowflake star can be made in multi colour also. 
Enjoy  it !


Saturday, 16 January 2016

PAPER CHAIN


Paper chain making is an enjoyable hobby for any time before a festive & special occasion. If you make them carefully and store them neatly after use, there is no reason why your paper chains should not last for any number of party occasions at home, college or place of work.

MATERIALS YOU NEED:
1. Paper - Construction paper or novelty paper or sketching paper.
2. Scissors
3. White glue

HOW TO MAKE:
1. Fold the paper of any length to make the cylindrical shape of 6cm or 9.5 cm diameter, as used by me and paste the open ends by overlapping each other by white glue. This pasting area of paper will be taken extra than the required diameter of the cylindrical shape.
2. Press the tube in such a way that pasting line comes somewhere near the middle. Mark the parallel lines of 1cm width on the 6cm size pressed tube or 2cm width on the 9.5 cm pressed shape.
3. Cut the stripes along the line and fold from the middle of each of them, as shown in the image.


4. Take two folded stripes. Hold open ends in your left hand, open loops of both arms of stripe and insert the other arms of stripes in the loops & stretch it to give the perfect position.


5. Now open the loops slightly of second stripe and place the open ends of third folded stripe into them.
6. Repeat the step 4 to put the next stripe of chain.
7. While inserting the open ends of strips progress in one direction only.
8. Repeat the process until you get the desired length. Length & width of the stripes should be consistent for a chain.


Experiment with the different papers & sizes and enjoy the use of unique decorations.


Monday, 21 December 2015

PINE CONE CRAFT

Pine Cone Bird

MATERIALS YOU NEED:
1. Big Pine Cone
2. Thick Wire - Approx. 24 inches [length of the wire depends on the size of pine cone]
3. Plier
4. Potter's clay or modelling clay or M-Seal
5. Acrylic colours
6. Paint brush

HOW TO MAKE:
1. Bend the wire from middle to make a loop.
2. Mark & bend both the end points of wire at 6 inches with plier. This length is used to form the paws by turning wire three times at 1 inch length.
3. Wire loop is wrapped tightly two times on the middle of pine cone.
4. Cover the wire with clay so that it is not visible.
5. On the bigger side of the cone, dab white glue, and then make the neck & face of the bird.
6. Balance the bird on its legs. If needed, change the position of neck or legs or put more clay on the wire wrapped on the body of bird.
7. Support this clay part while its drying. It may take one or two days to dry off completely.
8. After drying, colour it with acrylic colours of your choice.

Explore and create new wonders.


Clay & Wire
Wire Looped Pine Cone ; Clay Neck
Acrylic Painted Birds
Walnut Shell Neck & Pine Cone Body
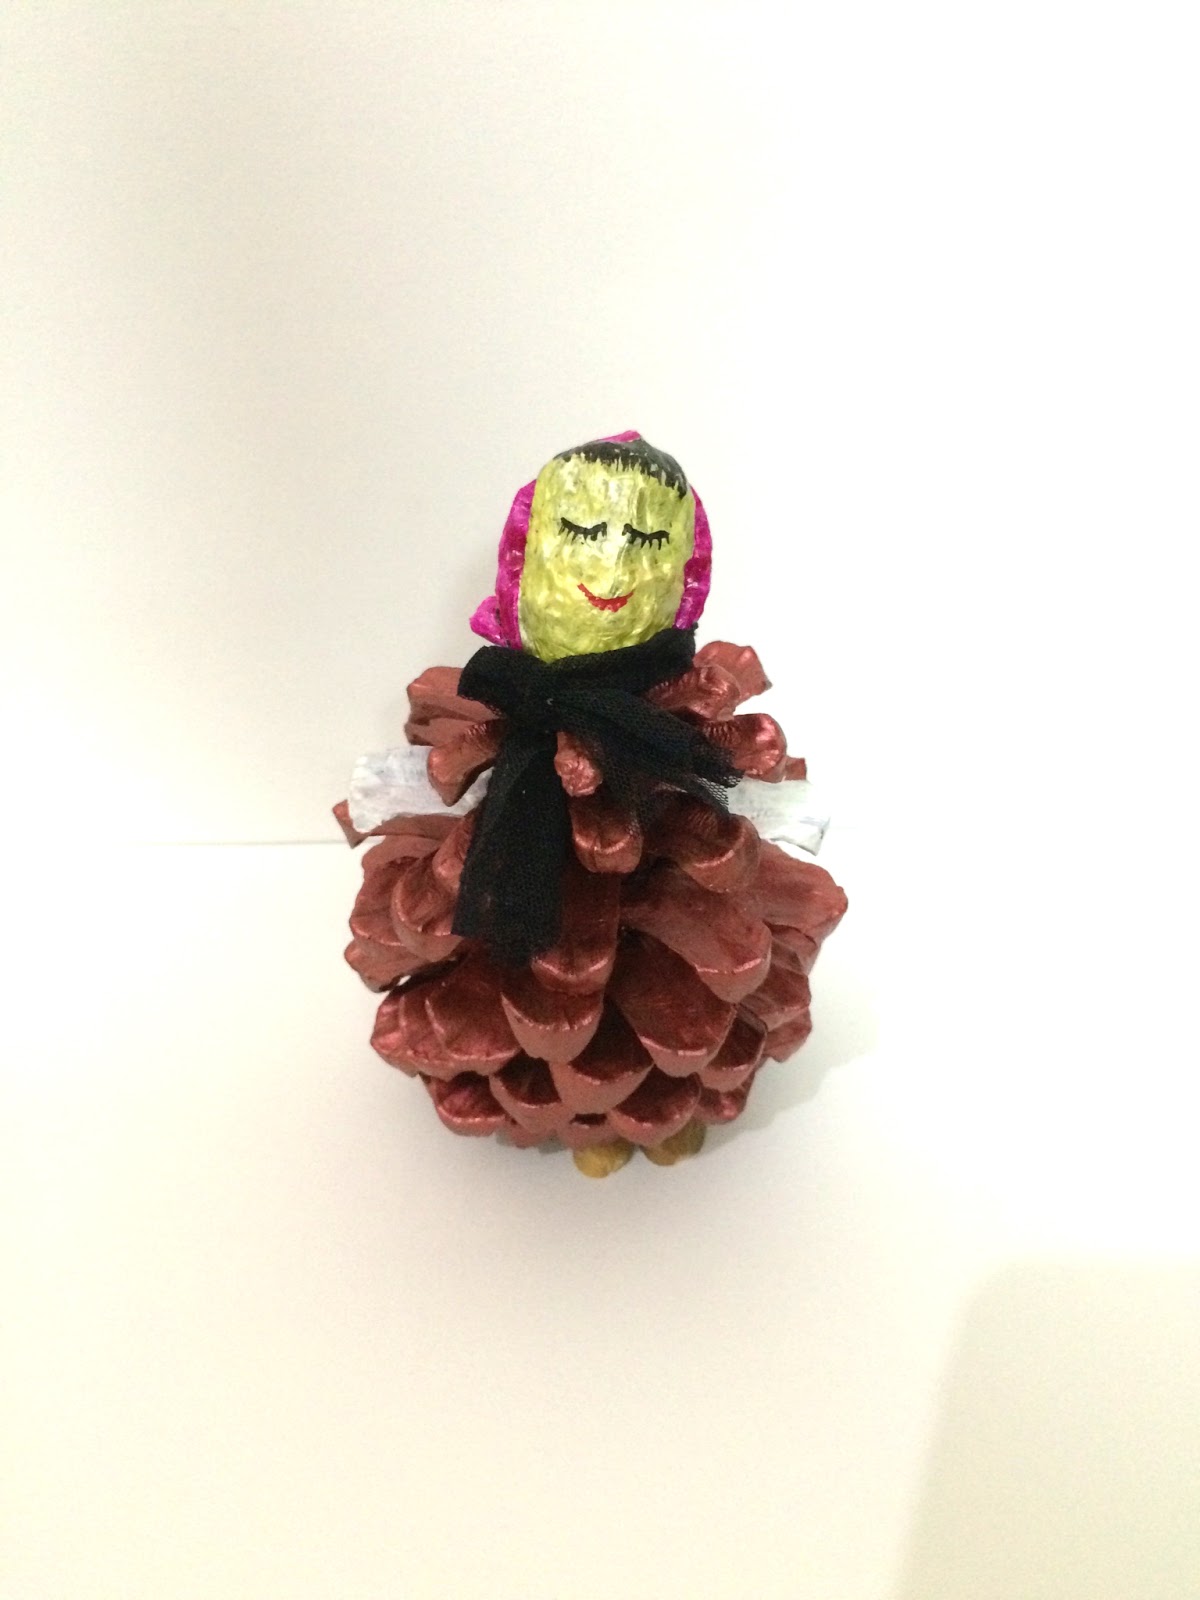
Pine Cone Doll

Pine Cone Tree


Friday, 18 December 2015

BEST OUT OF WASTE PART I


MATERIAL YOU NEED:
Pistachio shell, date seed, ice cream spoons, white adhesive, acrylic colors, cardboard/ MDF sheet/ discarded compact discs.


HOW TO MAKE:
1. Draw a design on a white paper of the size of the base on which waste products are to be used.
2. Color the pistachio shells, date seeds & leaves (cut from ice cream spoons) as per the requirement with acrylic colors. Keep them aside to dry for 10 minutes.
3. Stick the materials together with white glue (craft clue).
Experience & explore different designs of your choice.

Saturday, 15 August 2015

DR. APJ ABDUL KALAM … A TEACHER

Dr. APJ Abdul Kalam always used to say that he would like to be remembered as a teacher. He grabbed every opportunity to teach students. Administering a pledge on national development to the youth was his passion.
Minutes before his end came on Monday 27th July 2015, Dr. Kalam was teaching students at the Indian Institute of Management, Shillong.
“Teaching is a very noble profession that shapes the character, caliber and future of an individual… youth have a dream and also they have a pain. The pain comes out of their dream; they want to live in a prosperous, happy and peaceful India. This type of student’s environment ignites me and leads me to interact with young minds”, he said in an interview.
“One of the very important characteristics of a student is to question. A teacher should have a creative mind and encourage questions. At times, I find that teachers are in a hurry to finish the syllabus. But, there should always be discussion”, the former Indian President said during the course of the interview to national daily newspaper, The Hindu.

Retracing back to one of my memories about Dr. Kalam, on 22 December 2007, during the foundation week of CIE, Department of Education, Delhi University, where he delivered a lecture whose words have been etched upon my mind since then.
He summoned the prospective & existing faculty staff to commit themselves to his 11 commandments  for a proficient teacher.
  1.  First and foremost, I will love teaching. Teaching will be my soul.
  2. I realize that I am responsible for shaping not just students but ignited youths who are the most powerful resource under the earth, on the earth and above the earth. I will be fully committed for the great mission of teaching.
  3. As a teacher, it will give me great happiness, if I can transform, an average student of the class to perform exceedingly well.
  4. All my actions with my students will be with kindness and affection like a mother, sister, father or brother.
  5. I will organise and conduct my life, in such a way that my life itself is a message to my students.
  6. I will encourage my students and children to ask questions and develop the spirit of enquiry, so that they blossom into creative enlightened citizens.
  7. I will treat all the students equally and will not support any differentiation on account of religion, community or language.
  8. I will continuously build the capacities in teaching so that I can impart quality education to my students.
  9. I will celebrate the success of my students.
  10. I realise by being a teacher, I am making an important contribution to all the national development initiatives.
  11. I will constantly endeavour to fill my mind with great thoughts and spread the nobility in thinking and action among my students.